For general information on working with orders, please refer to the Order Details page.
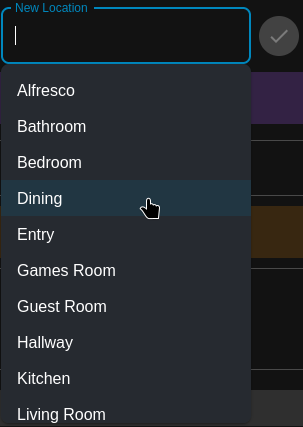
To add curtains to an order, start by creating a new Location on the order details page either by selecting one of the predefined options or by entering a custom value, then clicking on the green check button:
Then click the Add Curtain button for that new location:

A new curtain item will be added to the location, displaying the basic fields for the curtain:

Clicking on the double down-arrow icon will expand the item in order to display advanced properties for the curtain:

The following sections go into detail for each of the fields that can be completed for the curtain order.
Fabric #
The fabric field is used to select or enter the name of the fabric that will be used to manufacture the curtain. Omnivisor maintains a database of fabrics for a selection of suppliers, which can be selected from the dropdown after entering a few characters of the fabric name:
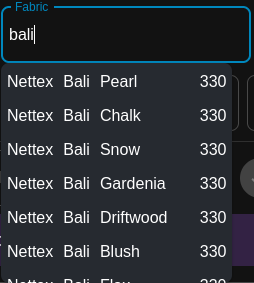
The search result fields display, in order, the supplier name, fabric range, fabric colour and roll width. If the fabric you wish to use for the curtain is found then simply click on it in the search results.
If you wish to use a fabric that is not in Omnivisor’s database, then simply enter the full name of the fabric.

For any fabrics that are selected for the order, a summary will be displayed at the top of the page underneath the general order details. This summary lists the fabric name, type of fabric, care code and roll width, and a total amount based on the sum of the automatically calculated fabric amount for each curtain that uses that fabric in the order. For the amount to be accurate the curtain item must be assigned a curtain header option that has its fabric and hook count formulas correctly configured, and have all relevant fields (header, track width, final width, final length, opening) correctly set.
If the selected curtain is not found in the Omnivisor database, then by default it will be displayed in the summary area without any values for Type, Care Code or Roll Width. For the fabric calculations to be correct these values must be set (to be more precise, at least the fabric Type and Roll Width must be set). Click on the fabric summary row to enter edit mode for that row, then provide values for the missing fields:

The fabric type is a select field with the following options:
- Sheer
- Lining
- Solid
- Triple Weave
- Velvet
- Jacquard
Select the correct type for the fabric from this list.
The care code field may either be manually entered or selected from a list of standard care codes. This field does not affect the fabric calculation, however the value entered here will appear on the printed product label and so is important in order to inform your business’s production line which care label to attach to the final product.
The Roll Width field is used to set the width of the fabric roll. This value is important for fabric calculations as it determines whether the curtain may be manufactured as continuous (i.e. one single piece of wide fabric) or non continuous (i.e. multiple separate fabric panels sewn together).
Once values have been entered for all fields, click on the Save button to save the changes.
For known fabrics that are selected from Omnivisor’s database these values should be populated automatically.
Header #
The Header field is used to set the header type for the curtain. The available values depend on which curtain header options have been configured in the settings. For any Header type that has a corresponding curtain header option configured, then that header type will be displayed in the dropdown select box.
The complete list of header types is as follows:
- Wavefold/SFold
- Double Pinch Pleat
- Inverted Pleat
- Knife Pleat
- Pencil Pleat
- Rod Pocket
- Single Pinch Pleat
- Triple Pinch Pleat
- Custom
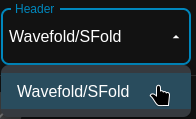
Select one of the options by clicking on the header field and then selecting an option from the dropdown list.
Depending on which Header option is selected, certain other fields may be either added or removed to the section. For example, for curtains with a wavefold header and where the track width and opening style is known (and the opening style isn’t set to custom), the Final Width/s field value becomes redundant as wavefold curtains are always made to the track width.
After selecting the curtain Header type, it is also important to ensure that a Header Option is selected also. In many cases this value will be set automatically to whichever value has been configured as the default in the curtain header options settings. In any case this field must be set to enable automatic calculation of fabric amount and the curtain cutting plan.
Track Width #
The track width is the full width of the curtain track on which the curtain will be installed. Enter a numeric value here.

Final Width/s #
The final width is the finished width of the curtain after it has been made. This field will only be available for certain header type/opening combinations as it is not always relevant depending on the circumstances.
The Final Width/s field accepts values in a number of different formats, which will also depend on the value set for the Opening field. For opening values set to Left Bunch, Right Bunch, or Floating then the Final Width/s field should be set to a single numeric value.

For opening values of Center Opening or Centre Floating the value should be a multiple of two. For example, since a center opening curtain is actually two separate curtains of the same width (which generally bunch up to both the opposite left and right ends of the track), then an inverted pleat curtain made to suit a 2000mm wide track might be specified with a final width of 1100×2.
Since pleated curtains are made to a slightly wider size than the track they are installed on (due to curtain spring-back) then the width of 2200 (the sum of both curtain widths, 1100 x 2) will provide the additional width required to allow for this. Enter the value, along with the multiplier directly into the Final Width/s field (which accepts this number format):

For Centre Offset curtains (where the left side curtain has a different width to the right side) then two comma-separated values should be entered to reflect these widths. Continuing with our example of a pleated curtain on a 2000mm track, let us assume that the curtain is being made to cover a 900mm doorway on the left and 1100mm window on the right, and the customer has requested the curtain made to line up with these.
Adding the additional width to allow for spring-back, the final widths for these curtains may be specified as 1000mm for the left, and 1200 for the right. This can be entered into the Final Width/s field as 1000,1200 as follows:

For curtains with an opening set to Custom, there are no limitations to how the final widths are specified. Since it is hypothetically possible to have any number of curtains of any width installed on a single curtain track, the Final Width/s field does not restrict the values entered for this opening type.
For example, for a 6m wide curtain track the customer may have requested three curtains of equal size (i.e. 2000mm). This can either be entered as three separate values (2000,2000,2000) like so:

However as we can see here the values start to scroll off the side of the field if they are too long. While this is still perfectly valid it might be more desirable to represent them using a multiplier, so instead of entering them as separate values (2000,2000,2000) it might be more concise to simply enter 2000×3.

It is also possible to combine multiplier values with single values, for example the customer may request four separate 1m curtains, along with a single 2m curtain. This may then be entered as 1000×4,2000 like so:

For curtains with an opening type of Custom it is also possible to enter a Final Width/s value for wavefold curtains (for other opening types the field value is not available). The values entered here should represent the width of each curtain track section for which a curtain should be made, and when added up should be exactly equal to the track width. This differs from for example a pleated curtain which is made with a width greater than the track width.
Final Length #
The Final Length field represents the finished length, (otherwise known as make length) of the curtain. It is the measurement from the top of the curtain itself to the bottom of the curtain, excluding any deductions for track, track fitting height, bottom gap or any other offsets.
A single numeric value should be entered here to specify the finished length of the curtain:

A useful calculator is available to assist in calculating the Final Length value. Click on the > icon to open the length calculator popup:
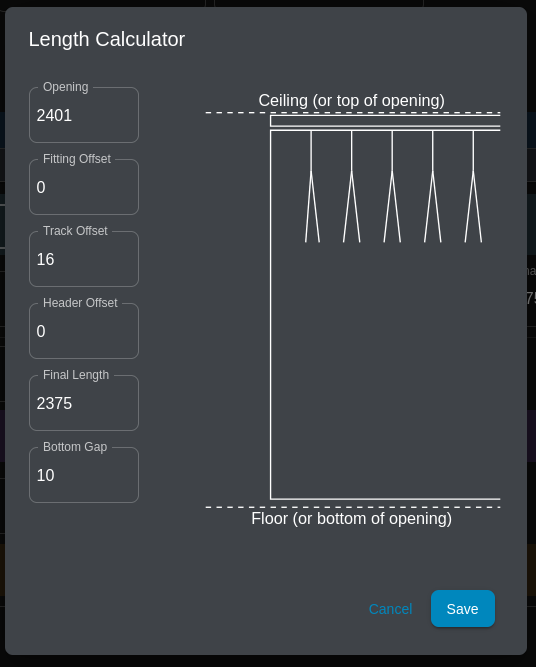
Modifying any of the values in the length calculator will cause the Final Length to be recalculated, while modifying the Final Length value itself will cause the Opening field to be recalculated instead. The following formula is used to calculate the final length value:
Opening - Fitting Offset - Track Offset + Header Offset - Bottom Gap = Final LengthThe available fields are as follows:
- Opening – the total measurement from the floor (or the bottom of the opening) to the ceiling or top of where the curtain track brackets will be installed.
- Fitting Offset – the height of the fitting used to install the curtain track. This could be as little as zero (0) if the curtain track is installed flush against the ceiling, otherwise it is generally only a few millimetres depending on the fitting.
- Track Offset – the height of the curtain track. This value defaults to 16mm however will automatically read the track height from the selected track profile if there is a curtain track associated with the curtain.
- Header Offset – this value is an offset defined on the curtain header option and allows an arbitrary offset to be applied to the length calculation.
- Bottom Gap – the size of the gap between the bottom of the curtain and the floor, defaults to 10mm.
- Final Length – the final make length of the curtain
Bottom Hem #
The Bottom Hem field is used to specify the bottom hem option for the curtain. The available options here depend on the bottom hem options that have been configured for your organization.
Click on the field to display the available options then click on one of the options to select it.
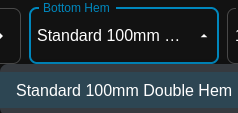
If the selected bottom hem option allows the overriding of the hem width (see Bottom Hem Options) then an additional field will be displayed for Bottom Hem Width which will display the default hem width. This value may be overridden by entering a different width value, allowing smaller or larger hems to be specified for the curtain.

Opening #
The opening style of the curtain. Available values are:
- Left Bunch
- Right Bunch
- Center Opening
- Floating
- Center Floating
- Center Offset
- Custom
Quantity #
This field may be used to enter a quantity for the item. By default the quantity will be set to one (1), however if the order requires multiple identical curtains then the quantity can be set to reflect this as needed.
Position #
The Position field is optional and purely informational in nature – it may be used to set the position of the curtain. For example, for a location that has both a sheer and a blockout curtain, the Position field may be used to specify which curtain is in front and which curtain is at the back.
Clicking on the field will display a dropdown list of options with the values of Front, Middle and Back:
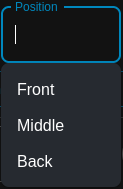
Any of these values may be selected, or alternatively some other value may be entered manually into the field instead.
Header Option #
The Header Option field is used to specify which of the curtain header options should be used for the curtain. The available options depend on which Header value has already been selected and which curtain header options have been configured for your organization.
Fullness #
The Fullness field is used to set the fullness for the curtain. The available options are defined on the curtain header options page and will depend on which header option is selected.
Side Hem #
The Side Hem field will only appear if there are multiple options available for the side hem selection, otherwise this field will be hidden and the value set automatically. The available options may be created on the side hem options page.
Fabric Quantity #
The Fabric Quantity field displays the amount of fabric required to make the curtain. The value should be automatically calculated as long as all required fields have been filled out for the curtain, the selected fabric has a type and roll width set, and the selected curtain header option has a valid formula for its fabric calculation. As a rule this field should not be manually entered by the user, unless the automatic calculation has not occurred for some reason.
Hook Counts #
The Hook Counts field is used to set the hook count for the curtain. If the header option, track width and opening are set, along with the fabric type and roll width, and the selected header option has a valid hook count formula then the value for this field will be calculated automatically.
If the curtain has been linked to a track, then the Hook Count field will not be shown – instead the Runner Count value from the curtain track will be used instead.
If a manual value is to be provided, it may be entered either as a singular value (e.g. 48), or as a multiple (e.g. 24×2) or even as a comma separated list (e.g. 24,24).
Return Left #
If the curtain has returns then the left side return width may be specified here.
Return Right #
If the curtain has returns then the right side return width may be specified here.
Adding a Sewn-in Lining #
If the curtain requires a lining fabric which is sewn into the curtain header along with the face fabric then the Add Sewn-in Lining button may be used to display the fields for the lining fabric and lining fabric quantity:

Select or enter a fabric for the Lining Fabric field – it provides the same search functionality as the main Fabric field:

The Lining Fabric Quantity field may be used to specify a quantity.
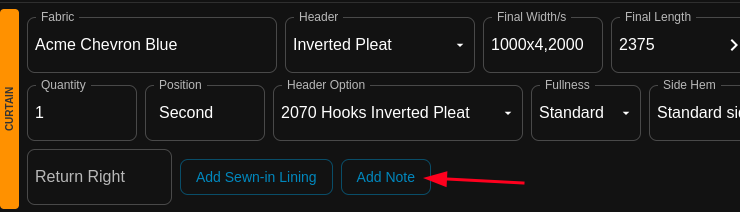
Adding a Note #
Notes may be added to individual items within the order to communicate special requirements for production of the item. To add a note to a curtain, click on the Add Note button which will then display the Note field:
Then enter the note as required:

Linking Curtains with Curtain Tracks #
If your organization supplies both curtains and curtain tracks, it is possible to link both of these together in an order to provide the following benefits:
- Linked order items are visually indicated on the order details page, making it easier to see which curtains are linked with which tracks
- Only one place to configure the track width and opening style instead of two, simplifying data entry and reducing the chance of human error
- Hook counts for the curtain will be automatically derived from the track runner count, if the track’s runner options have been correctly configured with a runner count formula
- If the track does not have a runner count formula, the curtain’s hook count formula will be used instead
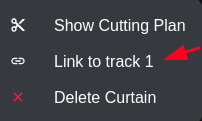
To link a curtain to a curtain track, first ensure that both have been added to the same Location within an order. Click on the Ellipsis icon at the end of the curtain row and select Link to track 1 (or whatever the track number is you would like to link to):
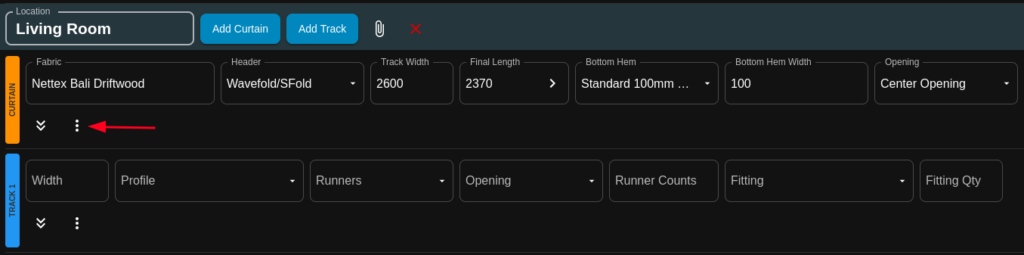
The items will then be linked together. The Track Width, Opening and Hook Count fields will no longer display on the curtain item, instead these values will be set and controlled on the curtain track.

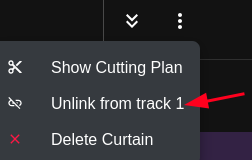
To unlink the items, simply click on the Ellipsis symbol for the curtain item again, then click Unlink from track 1.
Deleting a Curtain #
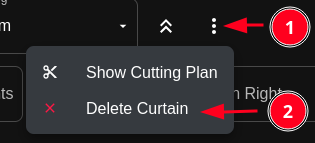
To remove a curtain from the order, click on the ellipsis icon at the end of the curtain summary row, then click on Delete Curtain.
A confirmation dialog will appear asking to confirm that the curtain should be deleted. Click the Delete button to confirm, or Cancel to cancel the delete.