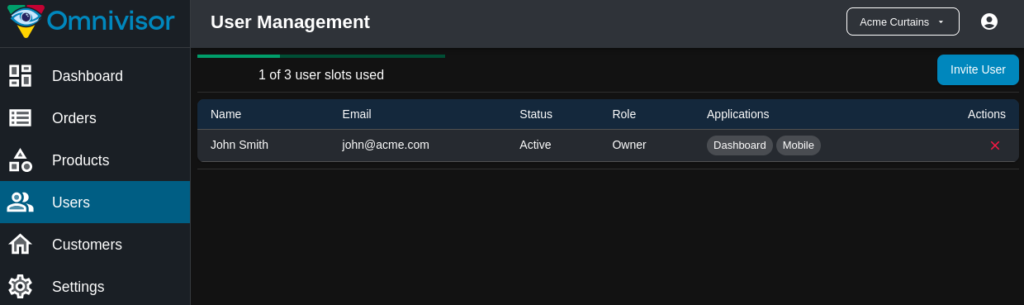
The users page may be used to add, update and remove users from your organization. The number of total user slots that are available will depend on your Omnivisor subscription level. You may invite new users to join your organization until all of the user slots are full – if you need to add additional users but have no available slots, then either existing users must be removed or alternatively a higher subscription level may be purchased.
User Roles #
Users may have one of the following four roles:
Owner – there must always be exactly one owner for an organization. The Owner user cannot be deleted, and their role may not be altered. They have full privileges and can perform any operation within Omnivisor.
Administrator – Administrators essentially have the same privileges as Owners, however they cannot assign (or unassign) the Administrator role to another user. They may manage all organization settings, and also manage products and customers. They can also invite new users to join the organization as employees or guests.
Employee – An employee may view orders but may not adjust any organization settings.
Guest – A guest user is a special user that has no implicit privileges for the organization – they cannot view or create any orders, products, users, customers or any organization settings. A guest user may be assigned to manage the orders for a single customer, after which they can create and view orders for that one customer only. This type of user is intended to allow your customers to log into your Omnivisor instance and place orders directly via Omnivisor Mobile, providing them with an order management portal.
Inviting a new user #
To invite a new user to join your organization, click on the Invite User button in the top right corner of the User Management screen. For each new user that is invited to join your organization, one of the available user slots will be used.
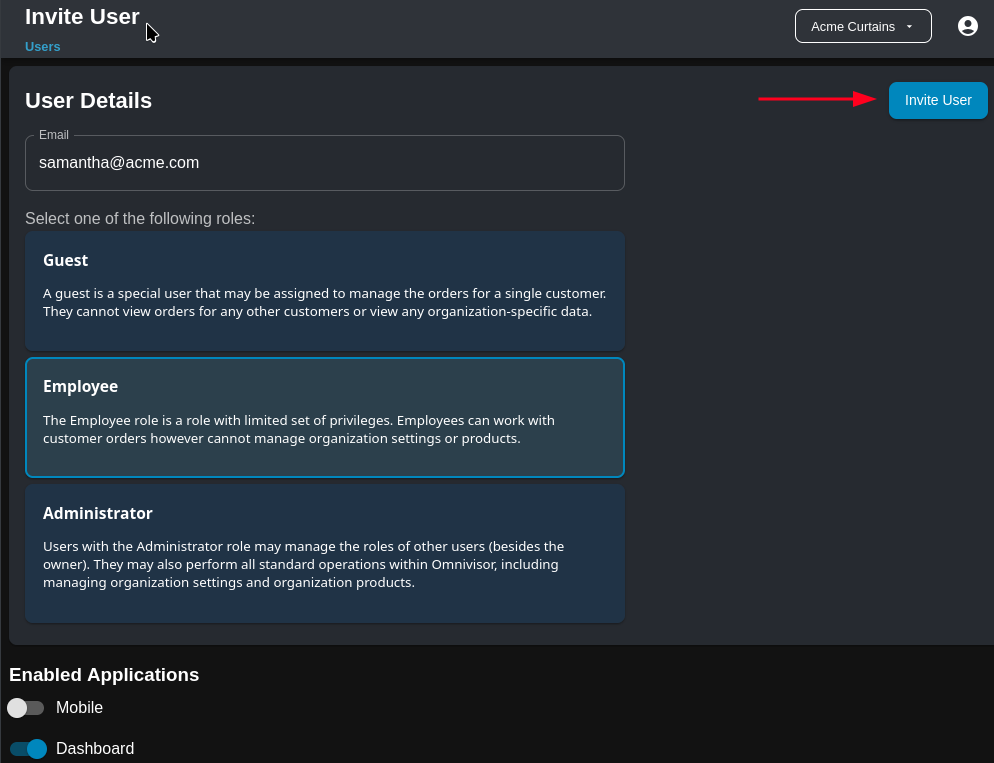
Proceed by entering the user’s details as follows:
Email – the user’s email address. An invitation will be sent to this email address containing instructions for the user to sign up and accept their invitation.
Role – the role to assign to the user. Refer to the previous section for details on user roles.
Enabled Applications – these switches control which of the Omnivisor applications should be made available to the user.
After entering all of the new user’s details, click on the Invite User button to create the new user and send the invitation.
Editing Users #
To edit a user, click on their table row in the User Management screen. The Edit User screen will be displayed where you can select another role for the user and modify the applications that the user has access to. After making any changes as required, click on the Update User button to save the changes and return to the User Management screen.
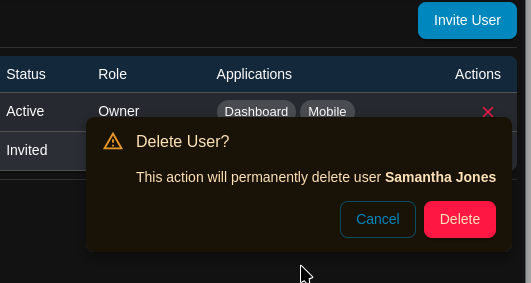
Deleting Users #
To delete a user, click on the red X in the action column of the table row containing the user. A confirmation dialog will be displayed – click the Delete button to confirm and delete the user, or the Cancel button to cancel and close the dialog.